Adding Custom Fonts to NextJS & Tailwind (Google and Adobe)
Introduction
Something as simple as custom fonts will elevate your web project to the next level. But how do you do that? Luckily for the web devs of 2023, we have a multitude of tools available at our fingertips to help us in design and development.
Google, making its presence known in all aspects of the web, has a library brimming with font families from serif to script to help enhance your project.
No luck finding a font from their options? No problem, where there is a need for design you can rely on Adobe to have a suite of tools, including custom fonts. Now this option might cost you a pretty penny, but the return on investment is almost instant as not only do they have more range in their choices, but the process of adding them to your project is also simpler.
Let’s get started.
The first step to any project is getting the necessary files downloaded first. If you haven’t already set up your NextJS/Tailwind project, go to: This Guide, to walk you through the steps.
To get us started, the first step we need to complete is creating a new file titled _document.js. This is known as a Custom Document and will allow us to use a custom <link> in our <Head> (the same place your metadata tags go) to add in our custom fonts. Once the file is created, add the following code:
import Document, { Html, Head, Main, NextScript } from "next/document";

class MyDocument extends Document {
  static async getInitialProps(ctx) {
    const initialProps = await Document.getInitialProps(ctx);
    return { ...initialProps };
  }

  render() {
    return (
      <Html>
        <Head />
        <body>
          <Main />
          <NextScript />
        </body>
      </Html>
    );
  }
}

export default MyDocument;
Google Fonts
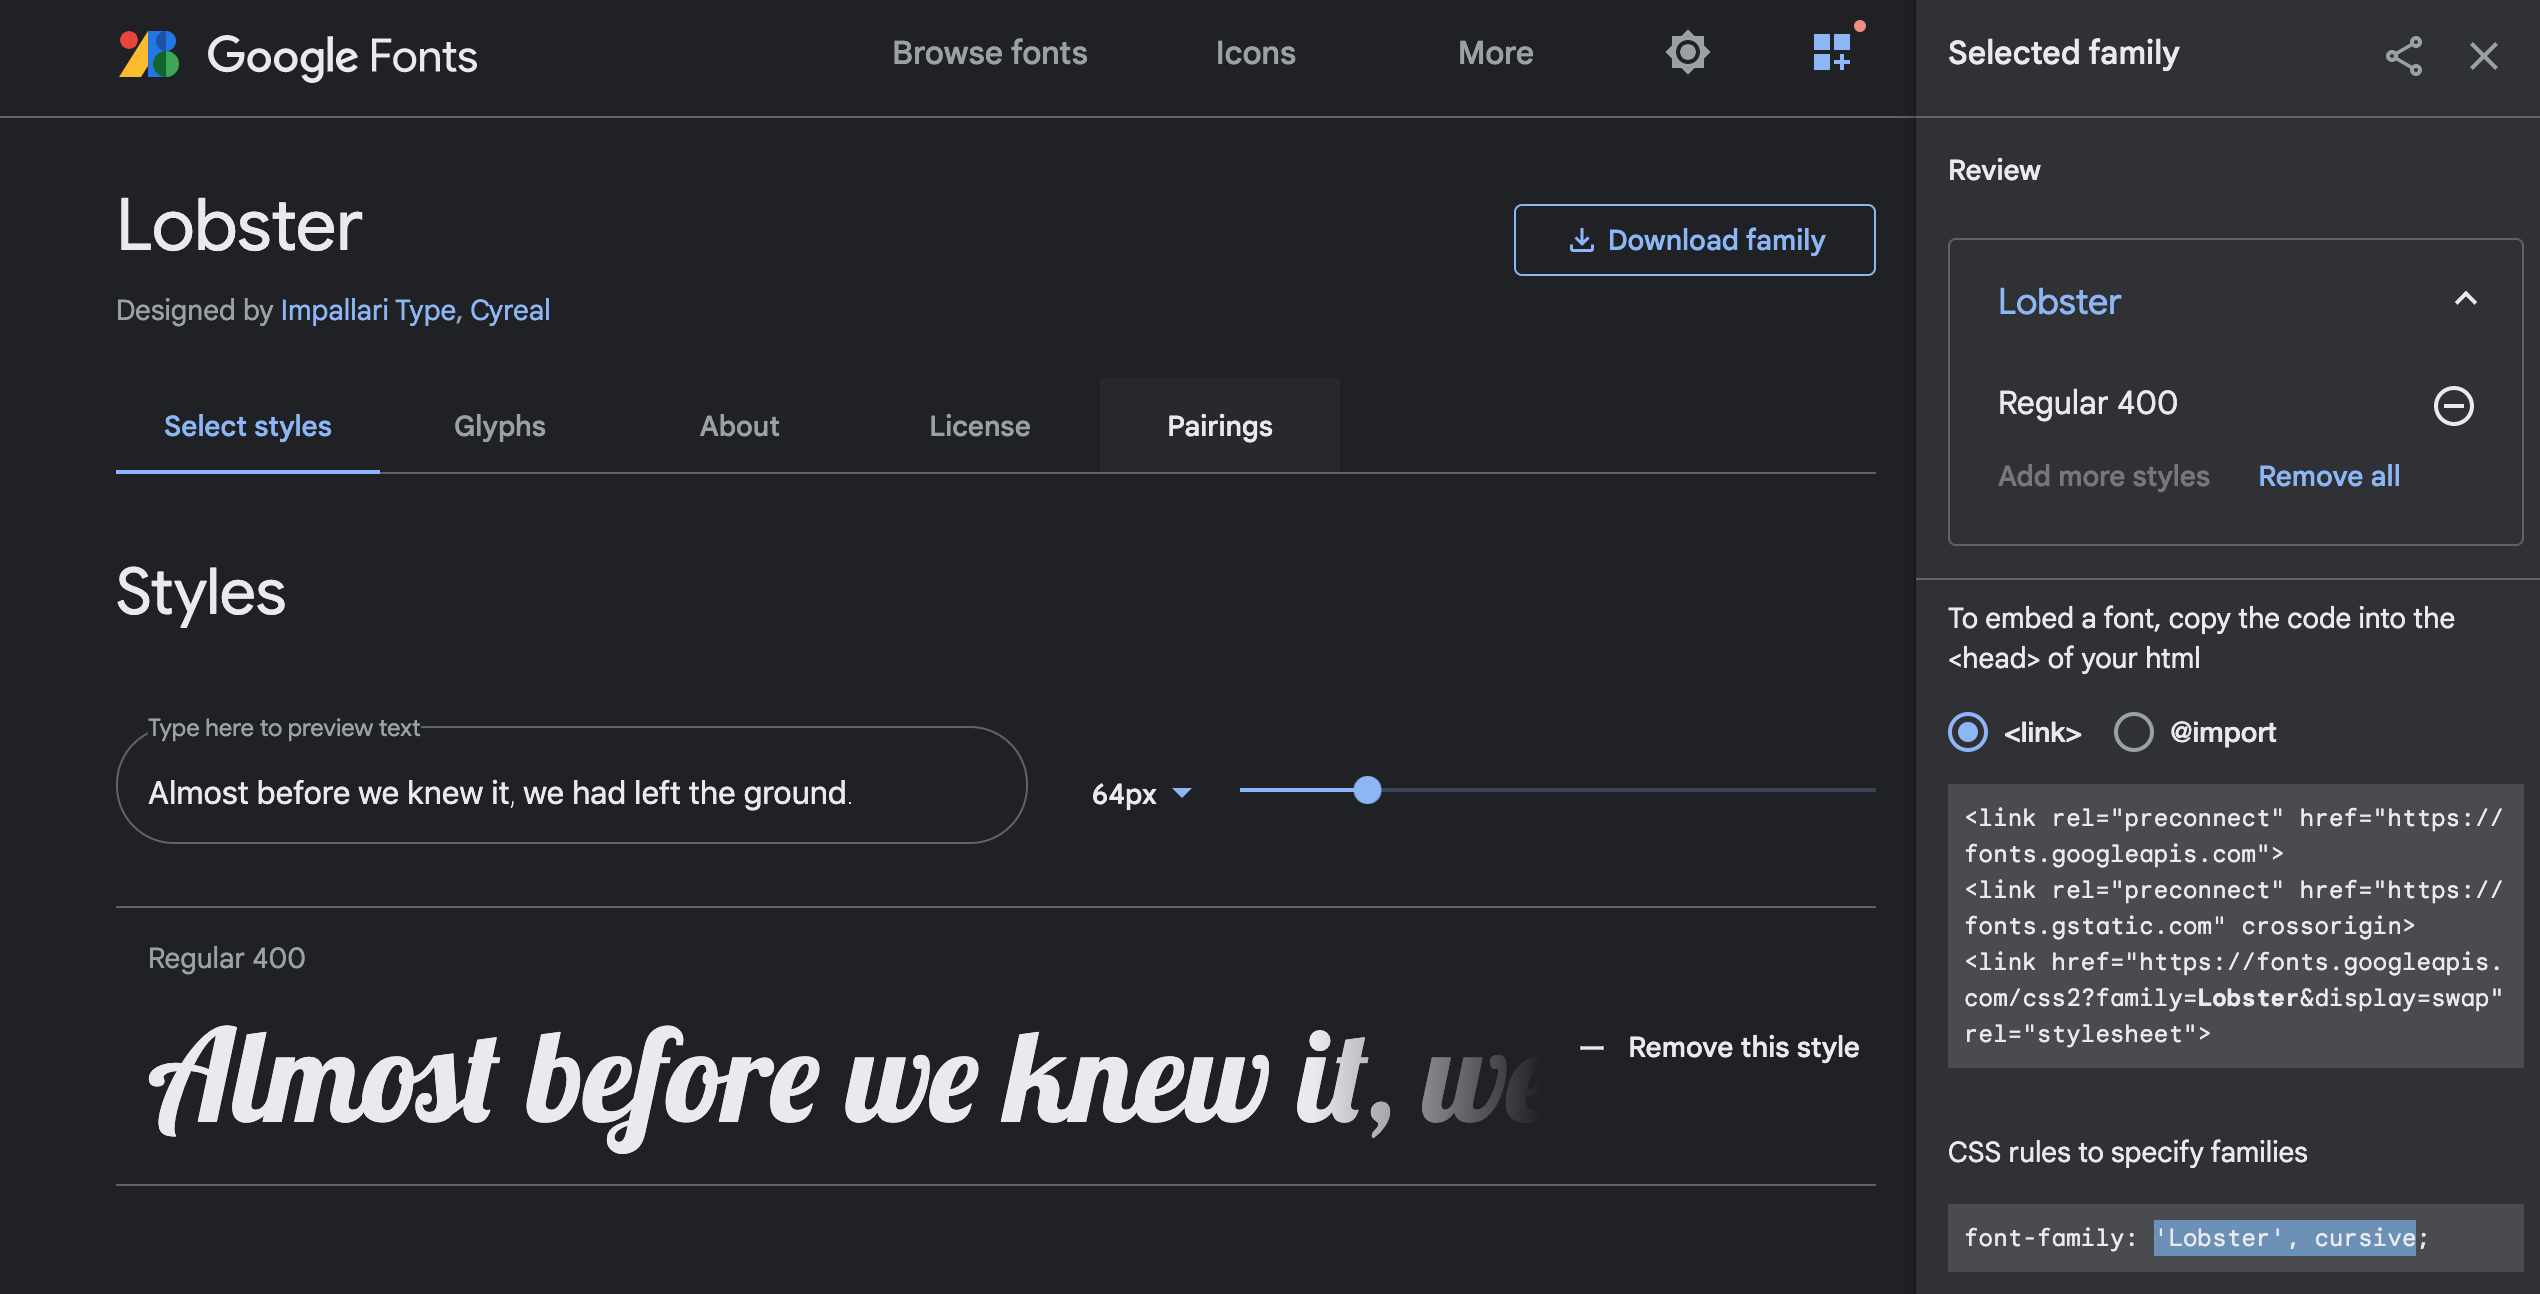
Go to Google Fonts, click on the font family you want and within that page select the styles you would like to use for your site. You will see a a sidebar automatically open up which will generate for you a custom <link> to import into the <Head> of your _document.js file.

Once you have all the styles you like selected, copy the link they generate for you and paste it in the top of your <Head> (don’t forget to make the link a self closing tag by adding /> at the end)
import Document, { Html, Head, Main, NextScript } from "next/document";

class MyDocument extends Document {
  static async getInitialProps(ctx) {
    const initialProps = await Document.getInitialProps(ctx);
    return { ...initialProps };
  }

  render() {
    return (
      <Html>
        <Head>
          <link rel="preconnect" href="https://fonts.googleapis.com" />
          <link rel="preconnect" href="https://fonts.gstatic.com" crossorigin />
          <link
            href="https://fonts.googleapis.com/css2?family=Lobster&display=swap"
            rel="stylesheet"
          />
        </Head>
        <body>
          <Main />
          <NextScript />
        </body>
      </Html>
    );
  }
}

export default MyDocument;
Now that we have the fonts we want imported into our _document.js file, the next step we need to do is extend our Tailwind theme to include the font. Open you tailwind.congif.js file and insert the following code:
module.exports = {
  purge: [],
  darkMode: false, // or 'media' or 'class'
  theme: {
    extend: {
      fontFamily: {
        'Lobster': ['Lobster', 'cursive'],
      }
    },
  },
  variants: {
    extend: {},
  },
  plugins: [],
}
Google fonts provides you with the font-family name, in this example 'Lobster' . The second font mentioned is a default font, in cases where the computer might not have access or the ability to access 'Lobster' . Our font can now be added as a class name, for example:
<h1 className="font-Lobster text-6xl">Now you've added a Google Font!</h1>
Which will result in the following:

Adobe Fonts
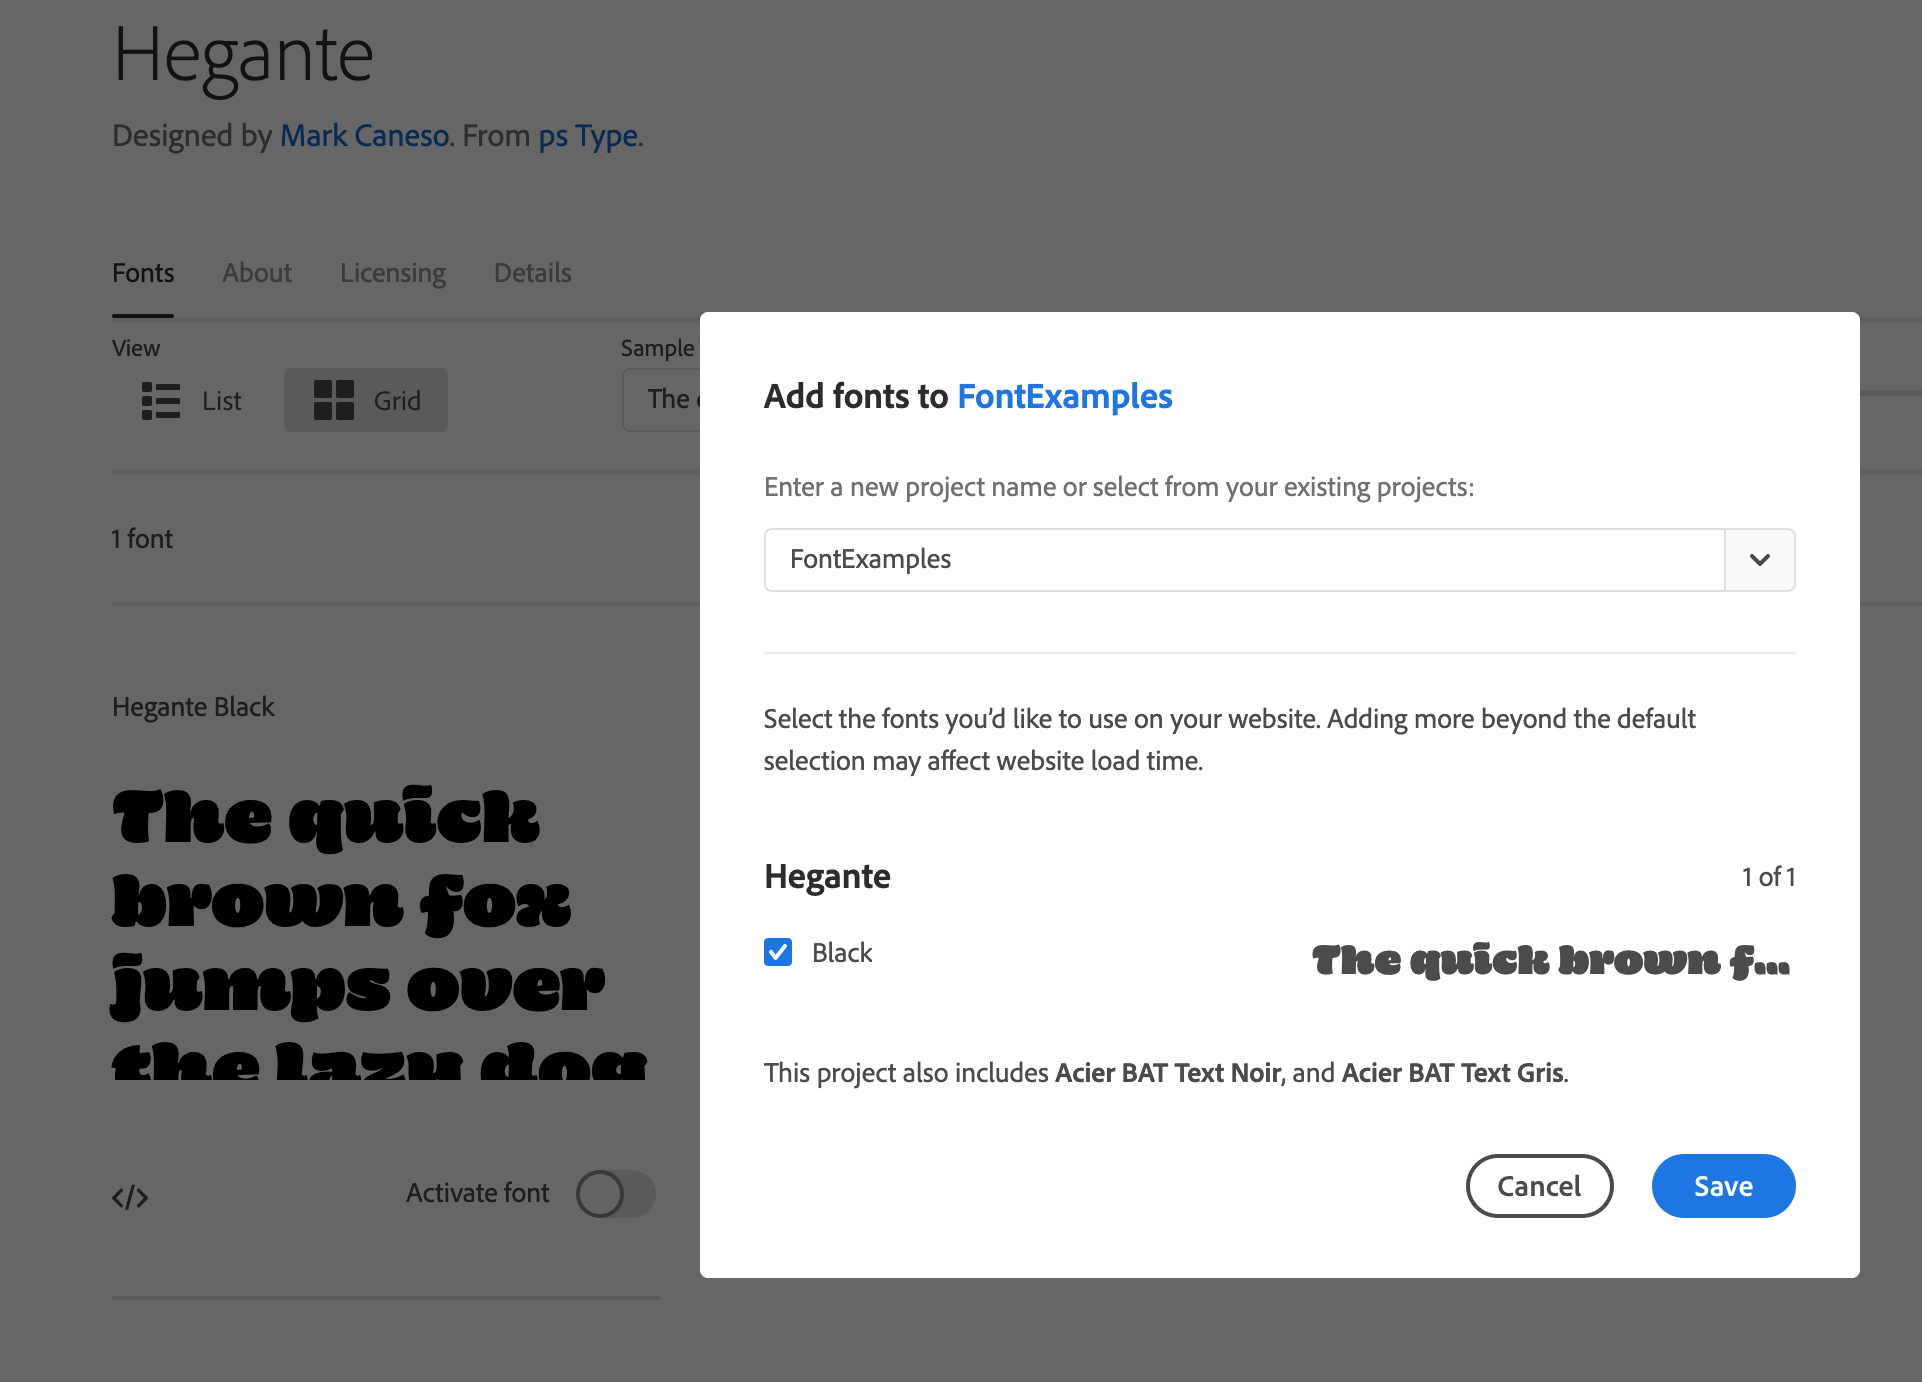
Adobe works in a similar, but in my opinion, more efficient way. In Adobe Fonts, once you’ve found a font you want to use in your project, you can click on the </> symbol and add it to a ‘web project’ folder.

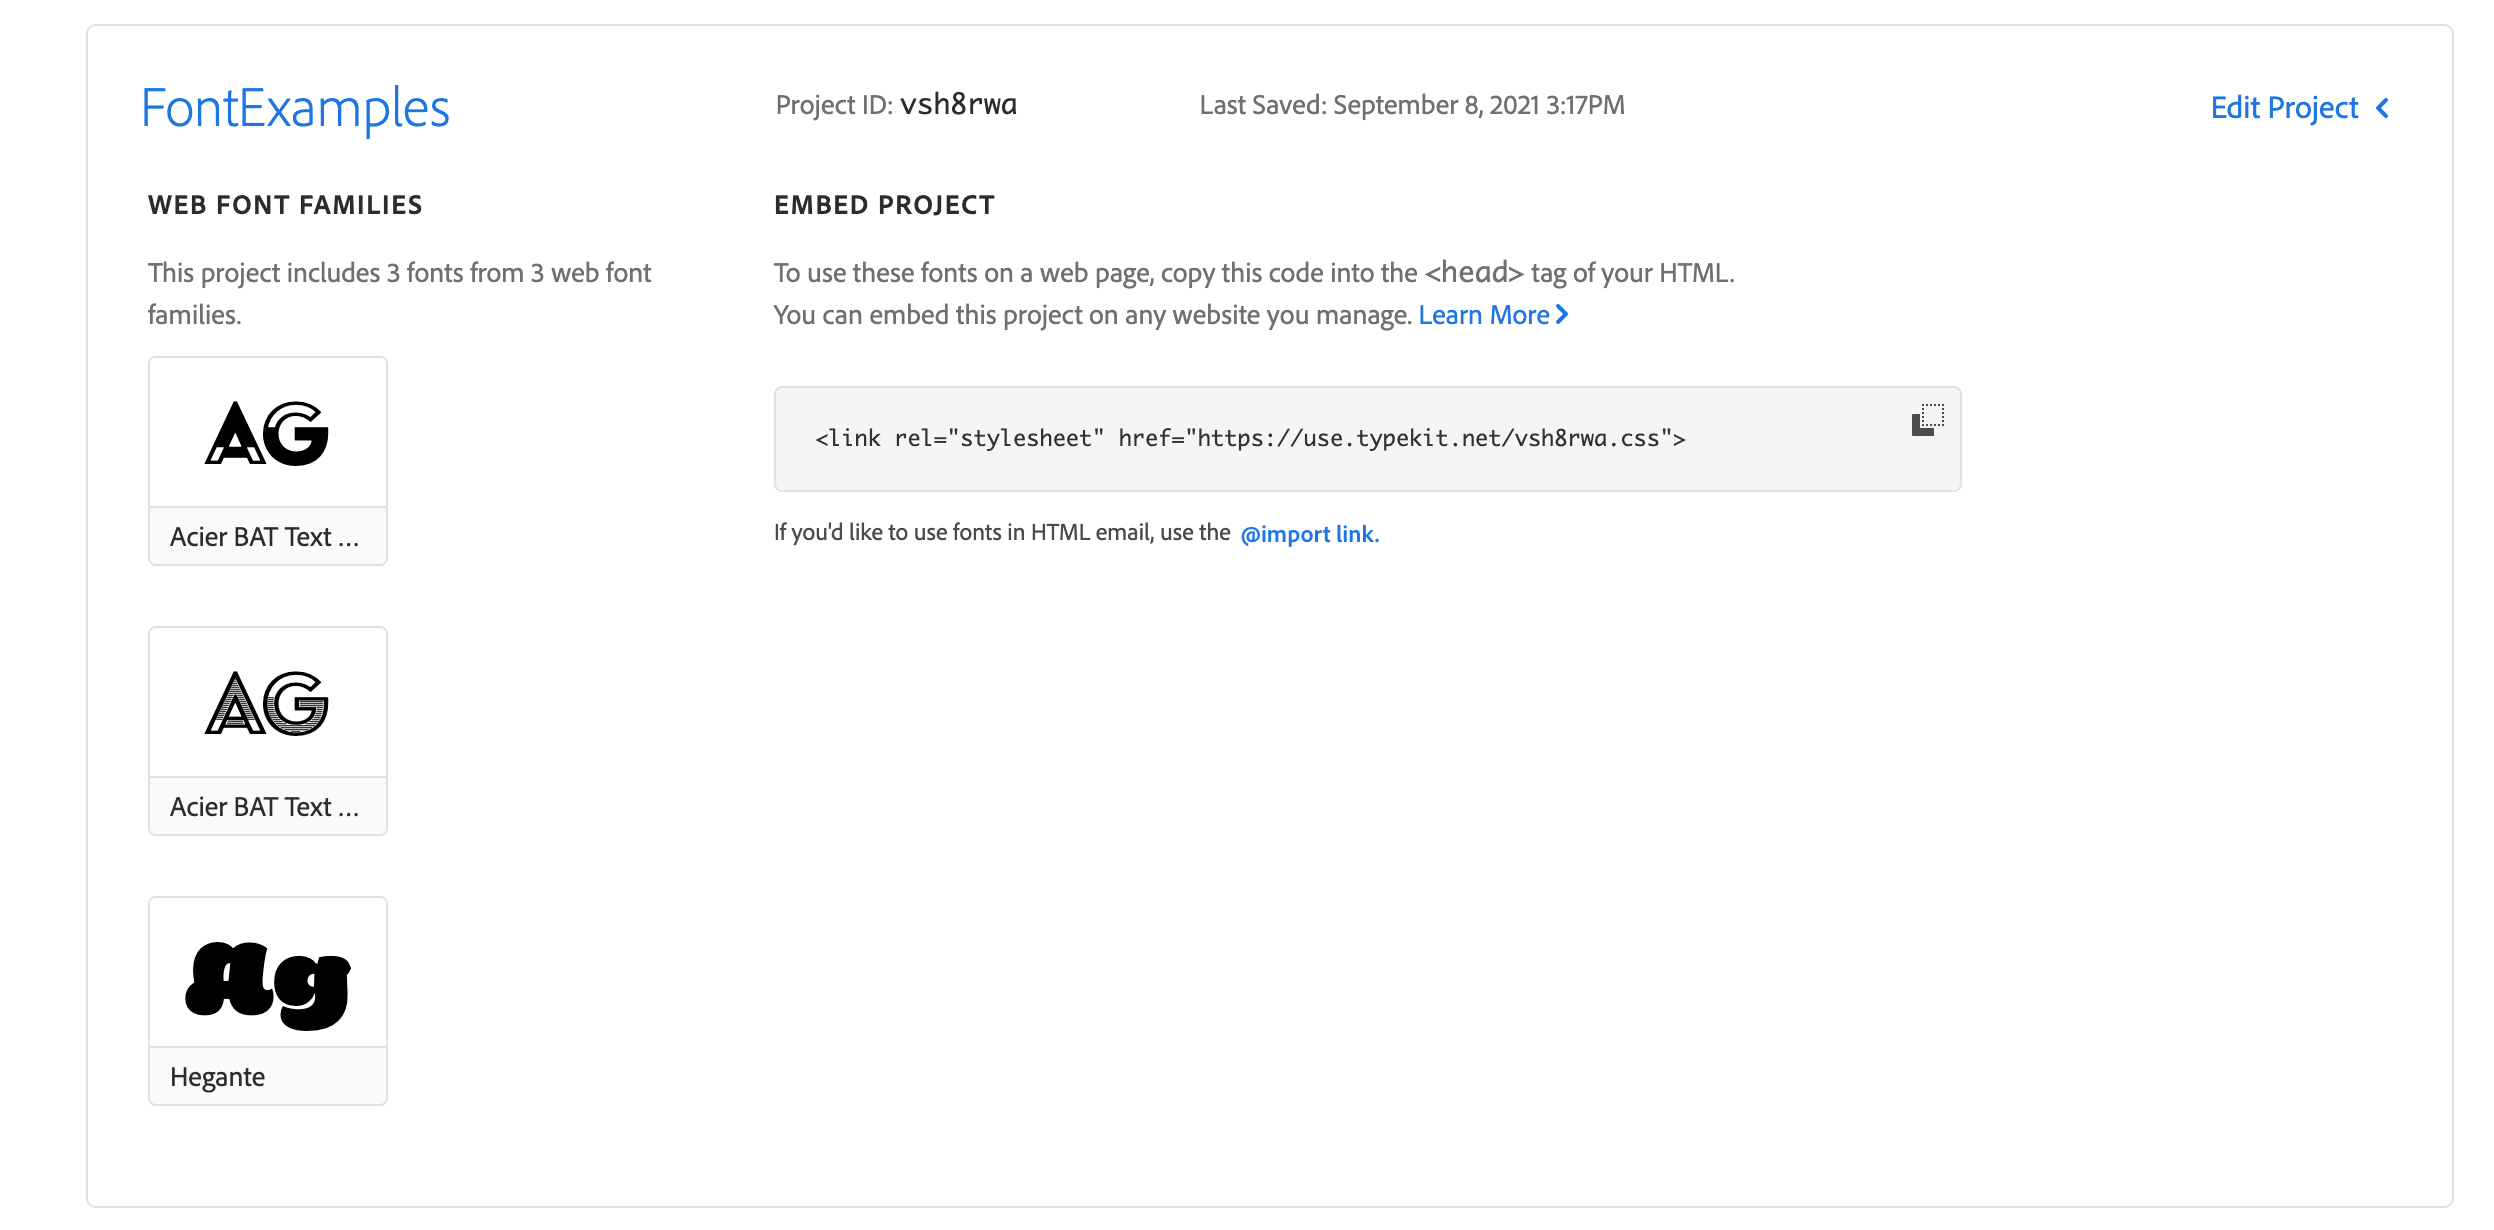
This folder will allow you to store the fonts you want to use in your project all in one place. You can edit the project and add more style types for a font-family or even remove a font-family entirely if you want.

When you are ready to add the font to your code, you will see in the above image that it creates a single link that will allow all of those fonts to be added to your project. Copy this link into your <Head> and make the link a self-closing tag.
render() {
    return (
      <Html>
        <Head>
          <link rel="stylesheet" href="https://use.typekit.net/vsh8rwa.css"/>
        </Head>
        <body>
          <Main />
          <NextScript />
        </body>
      </Html>
    );
  }
}
And just like we did with the google fonts, we will add each family to our tailwind.config.js file.
mode: 'jit',
  purge: ['./pages/**/*.{js,ts,jsx,tsx}', './components/**/*.{js,ts,jsx,tsx}'],
  darkMode: false, // or 'media' or 'class'
  theme: {
    extend: {
      fontFamily: {
        'Acier-Noir': ['acier-bat-noir', 'sans-serif'],
        'Acier-Gris': ['acier-bat-gris', 'sans-serif'],
        'Hegante': ['hegante', 'sans-serif'],
      },
    },
  },
  variants: {
    extend: {},
  },
  plugins: [],
}
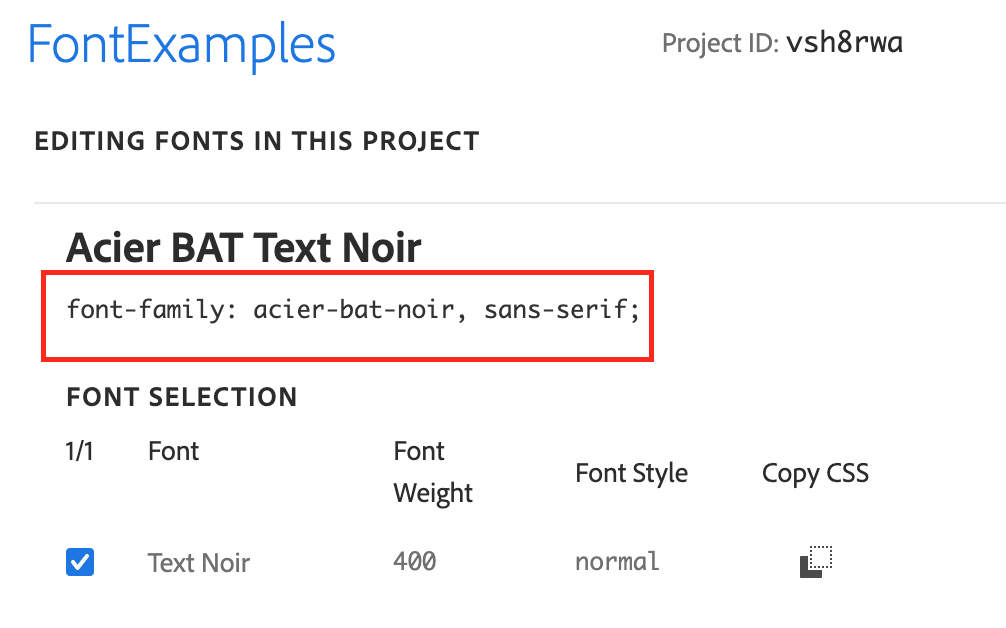
The name needed to access a particular font-family can be found just below the font-family name in your web project. Go to your web project, click edit, and the proper format should be found there.

And just like before, we will add the assigned font-family to our desired text.
<h1 className="font-Hegante text-4xl">Now you've added an Adobe Font!</h1>
Which will result in the following:

I hope you found this quick tutorial helpful. If you did you might like some of our other posts, like this one for eCommerce on the jamstack